|
Windlace Installation
Now that you have followed the
Windlace Removal process, it's
time to reinstall the new Windlace. Postwar Studebaker Windlace is
somewhat unique. It has a much wider tab on it than the standard
off-the-shelf Windlace you can purchase at most auto interior supply
stores. The original Windlace also had a metal screen sewn into the
tab, so that the Windlace was held in place better. Most home hobbyists
do not have access to a suitable wire screen to add to the new
Windlace. What I have done, is used a heavy denim material, that has
been starched to make it stiff. This is sewn to the Windlace on the
headliner-side of the Windlace tab.
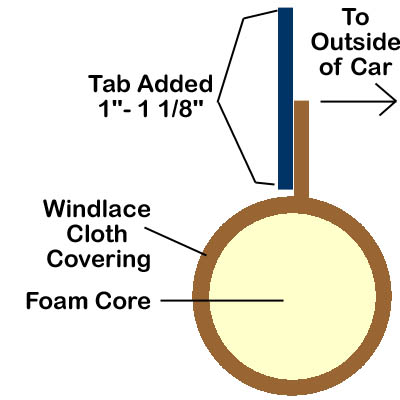
- Windlace with "tab" sewn to it. The tab should be 1"- 1 1/8"
long, measured from the edge of the urethane foam core.
- The Windlace is installed under the existing stamped body clips
around the door openings. You may have to cut V-shaped notches in
the Windlace tab- to get it around some tight corners. Do not cut
them within 1/4" of the Windlace core. It is best to do these
one-at-a-time so you don't accidentally cut a notch where a
retaining clip needs to hold the tab.
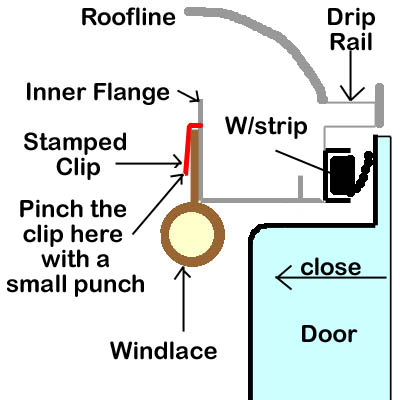
When tightening the
clips, Do NOT flatten the entire clip with a hammer. Use a punch
or small chisel against the TIP of the clip only. The edge of the
foam core must fit snugly against the inner flange of the roofline
and the core must hang just below the flange. Do NOT fold the tab
to get the Windlace into position. If the tab is slightly too long,
cut or trim the tab to allow proper positioning.
This
allows the door to seal nicely against the weather strip and the
Windlace when fully closed.
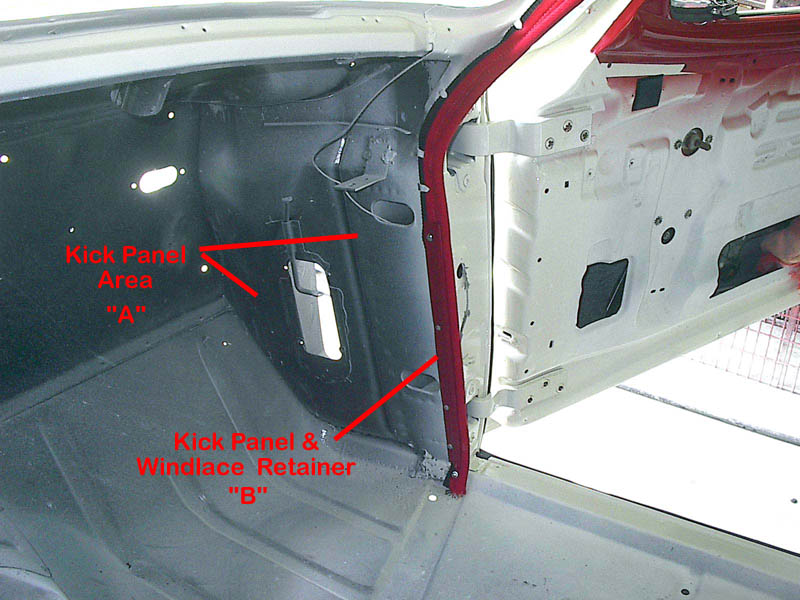
- Once you have the Windlace installed all the way around the
door opening, re-install the upper door Headliner Retainer and any
other sheet metal Windlace retainers. These are usually found on
the lower sections of the door opening for extra support where
the Windlace will be contacted while entering or exiting the
vehicle. Install the front kick-panel retaining strip and/or the
fiber kick panel.
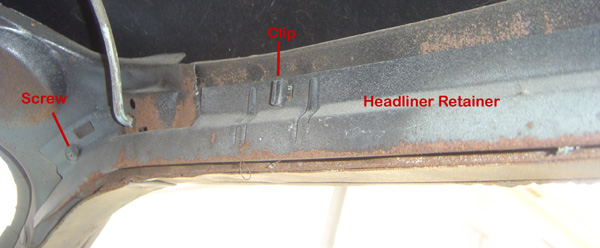
To install the Headliner Retainer:
Slip the Retainer over the clips through the slots. Install any
screws first to hold the retainer in place. Grab the square clips
with wide-jaw linesman pliers. Turn the clips 90 degrees while
pulling outward on the pliers and pressing the Headliner Retainer
inward.
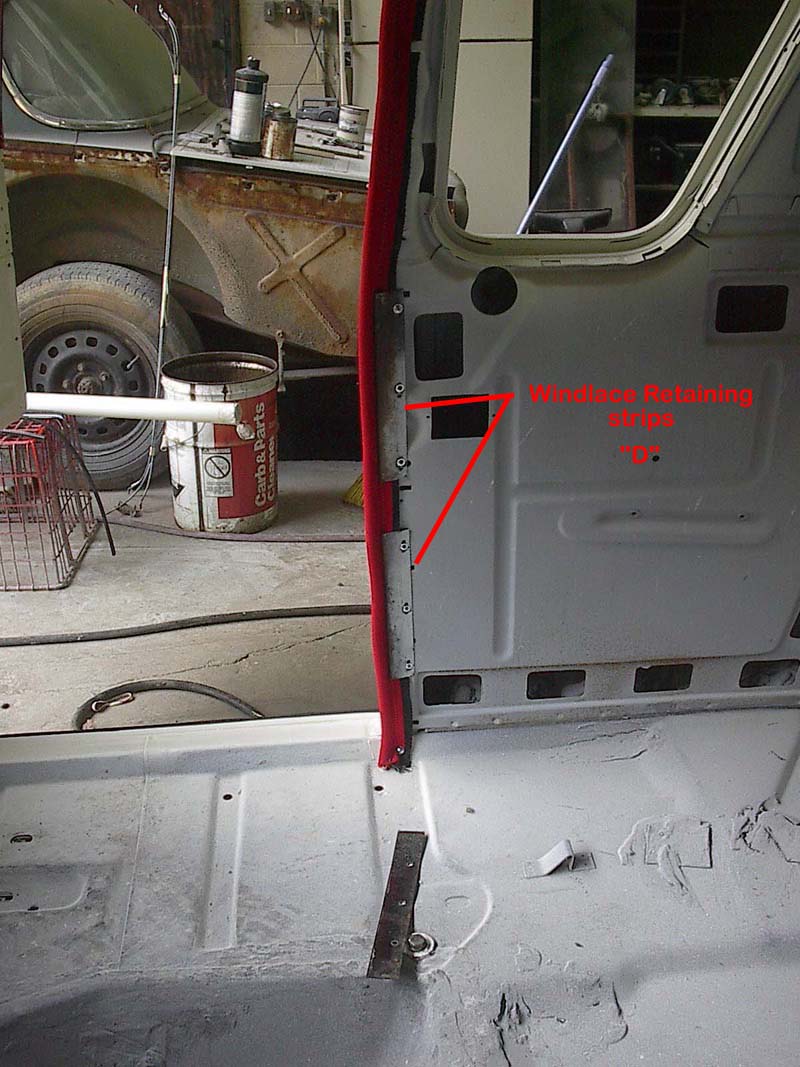
I also like to add a washered-interior screw
through the Foam core at the end of the Windlace. Be sure the
Windlace is long enough to tuck under the carpet.
- Install the
Headliner and Interior panels
|