
| For Ray-Lin Index, click HERE ***** To return to the BCOIE Chapter website click HERE or on our logo above. | ||
|
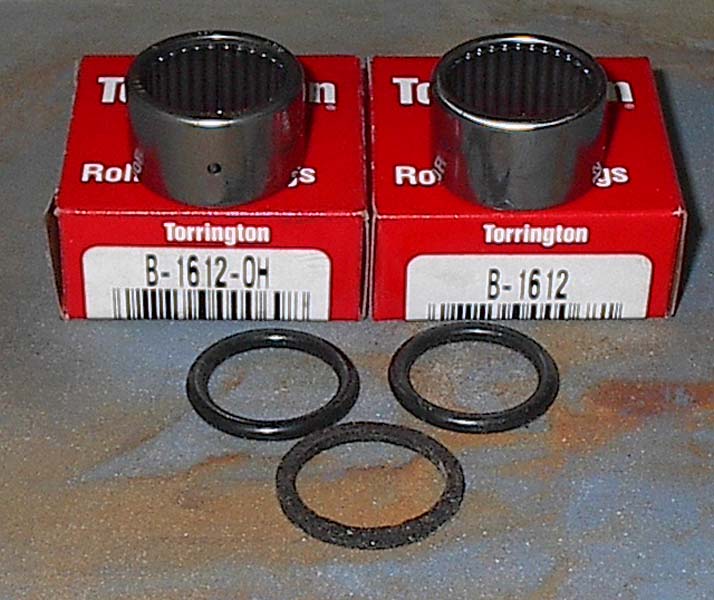
Studebaker Steering Bellcrank: Center Pin Rebuilding Parts Needed:
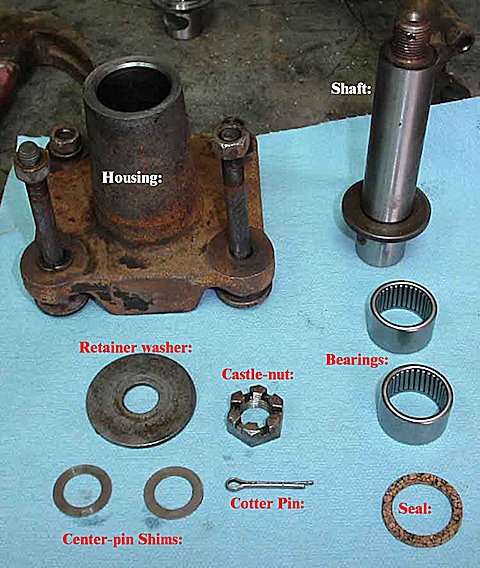
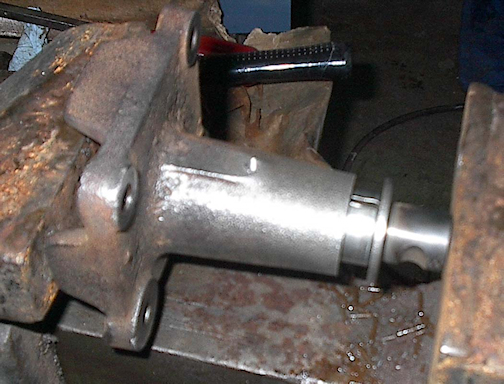
2. Once removed from the car, you can disassemble the center pin assembly. DO NOT place the center pin shaft in a vice WITHOUT using a bolt to keep it from spinning as you remove the large retaining nut- you may damage the machined shaft, making it difficult to reinstall. Remove the cotter pin, and use a large socket and breaker bar to remove the retaining nut. It can be quite tight.
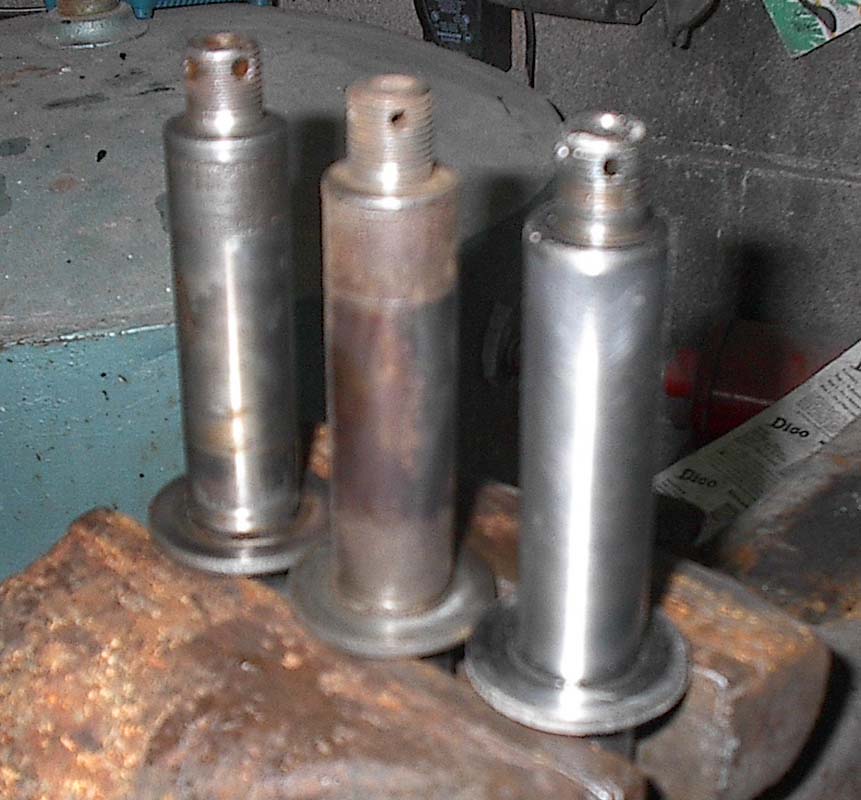
3. Shown below are some "typical" used center pins. (L-R) a "useable" pin with average wear, an unuseable pin with rust damage and severe bearing wear, and a well-maintained (greased) or recently replaced pin.
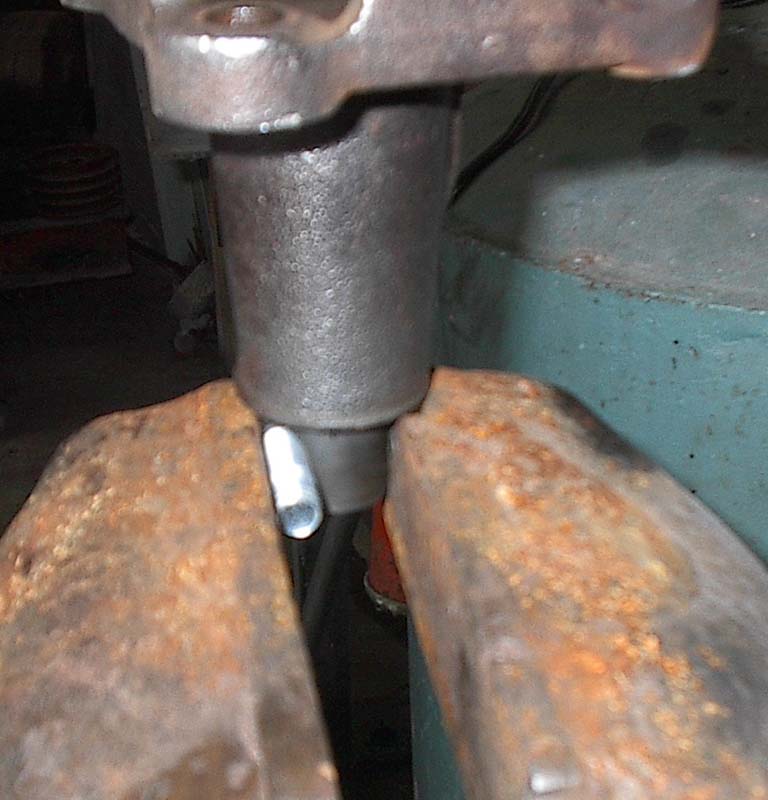
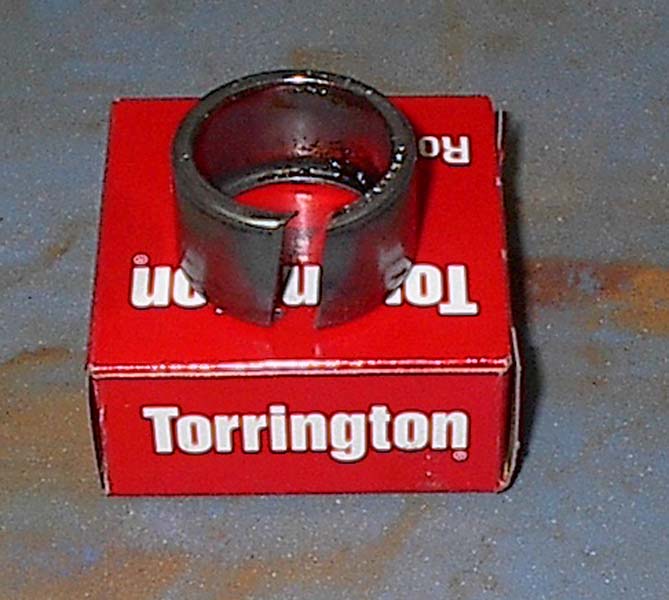
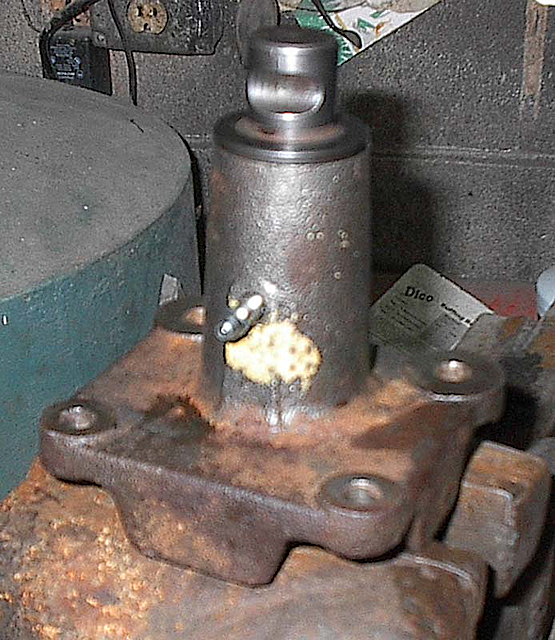
4. After cleaning up the pin and housing, It will be necessary to knock out the old bearings. This can best be done using the vice, and a large flat screwdriver or punch. Try not to damage ONE of the bearings, so that you may use it to create a bearing installation tool. After removal, take one of the used bearings and remove the needles. Then cut a "slot" in the bearing using a cut-off wheel or something similar. This "slot" aids in removing the tool from the center pin bore after pressing in the new bearings. Bearing Tool: 5. This is where I "modify" the assembly procedure. I rebuild my pins using (3) bearings instead of Studebaker's (2). I feel that this helps to relieve pressure on each bearing, spreading it over the (3) bearings. The "middle" portion of a used shaft, generally has no wear, so a "borderline" pin may be salvaged using (3) bearings. The first bearing to press in is the (center) 1612-OH bearing (oil-hole). The oil-hole in this bearing MUST be aligned with the grease fitting in the housing so that grease may pass through it to the other bearings. If not installed properly, you will NOT be able to grease the pin. Pressing in the oil-hole bearing: Use the press-tool to recess the bearing deep enough to align the hole with the grease fitting.
|
|
6. Install the upper and lower bearings. RECESS the lower bearing the THICKNESS of the o-ring or cork seal below the machined surface. This allows the installation of the 0-ring, or cork seal. If you don't recess the bearing to provide room for the seal, the seal will be damaged whenever the car is driven. Recessed bearings: O-ring installed |
||
|
||
 |
||
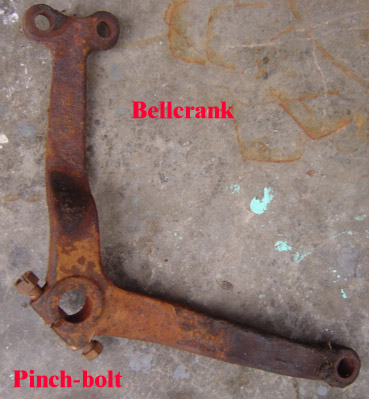
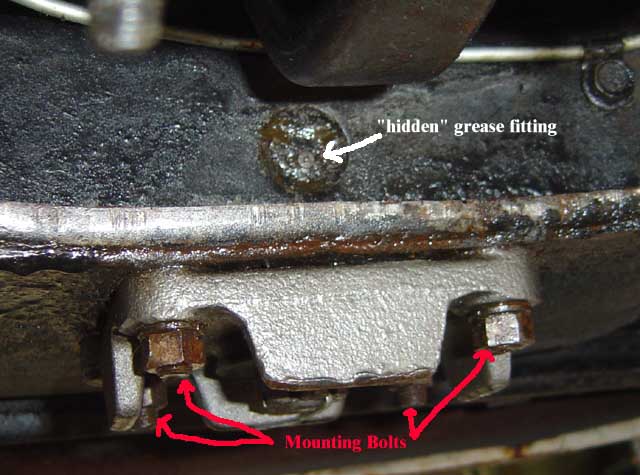
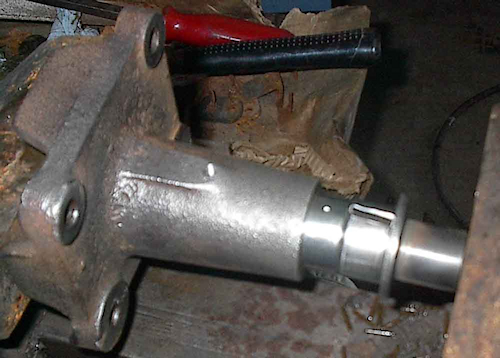
| 8. Remove the grease fitting. Reinstall the housing into the crossmember. Install the mounting bolts, but DO NOT fully tighten the play allowed, will aid in aligning the bellcrank and pinch bolt. Install the bellcrank. Align and install the pinchbolt by using a wrench on the castle-nut to align the slot in the shaft. Tighten the mounting bolts, pinchbolt,and install the cotter pin through the castle-nut. Install the grease fitting. Regrease as necessary. | ||
| www.StudebakerSoCal.com |

