|
Replacing the Original Felt Timing Cover
Seal - with a Modern Neoprene Seal
The original felt seal for the timing cover of a V8
Studebaker- WILL LEAK as it ages. While it's nice to keep the front
crossmember and framerails from rusting- It messes up the driveway (you
drive your Stude don't you?) or perhaps the garage floor. This is a
common problem with the Studebaker V8s. For many years, Ingvar Vic
(Western Lake Erie Chapter), would machine the hub and add a neoprene
seal to the front timing gear covers. I had Ingvar do several for me
over the years, and the results were excellent. However, sending the
cover off- and waiting for it to return- was sometimes problematic for
me and my customers. One of our NCSDC Club Members came up with the
following conversion. Just about anyone can do it easily- with the bare
minimum of tools. If you are skilled enough to tackle the job of
assembling an engine- you can certainly handle this conversion.
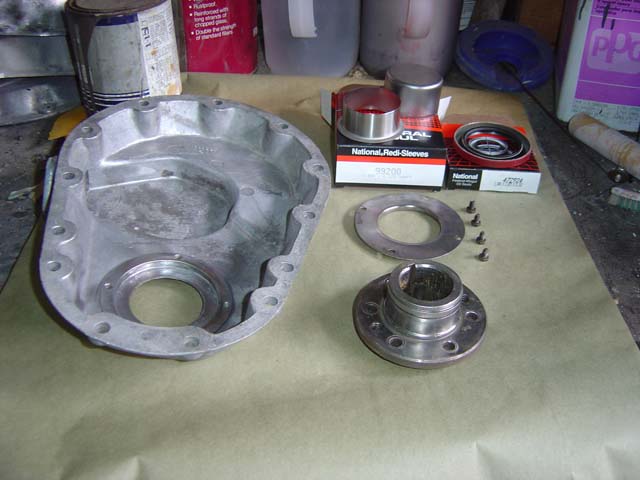
What you need:
-
Timing cover and hub- Cleaned and free of
oil/grease. Be sure to remove any burrs or rough areas from the
hub- and clean the timing cover gasket sealing surfaces. It's also
a good time to check the threads on the fuel-pump boss. Often they
get weak from overtightening. Run a 5/16" coarse thread tap through
them to clean them up- if you have any concerns.
-
National Seal #99200 Redi-Sleeve with Pusher tool-
The package comes with a "cup-shaped" pusher tool that simplifies
installation.
-
National Seal #472924 Oil Seal
-
Vice- (can use hammer and block of wood)
-
Red Silicone gasket sealer
-
Red Loc-Tite fastener cement
-
Tin-Snips
Procedure:
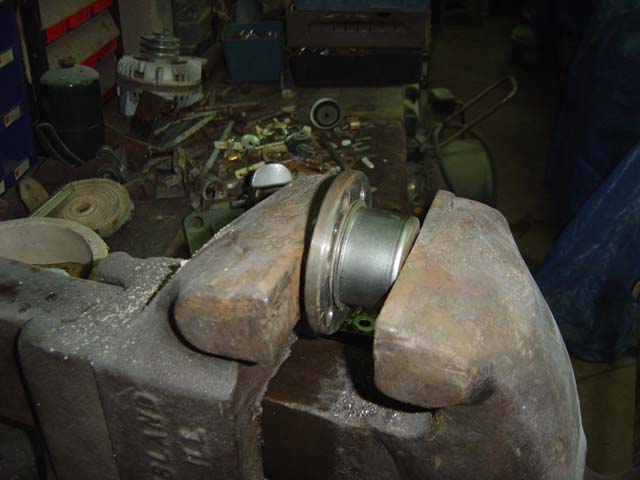
-
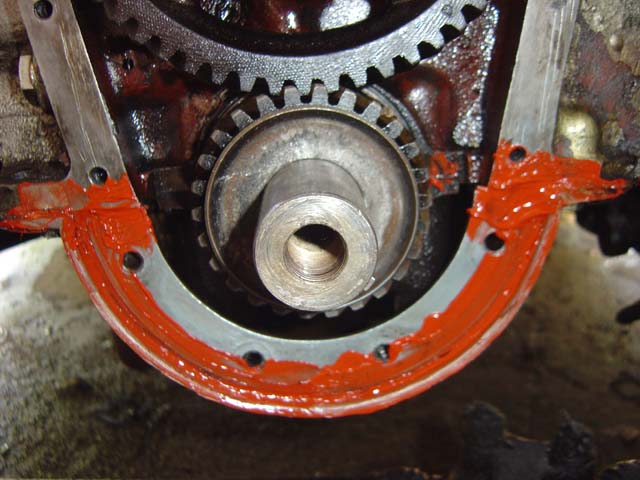
Installing the Redi-Sleeve on the hub: Use a
vice and the Pusher-tool (included with the sleeve- see above
photo), to press the Redi-Sleeve onto your original hub. You do NOT
need to use heat or lubricant to press the sleeve on. Be sure your
hub doesn't have any burrs, or rough areas on the sealing surface.
**You "may" use a hammer and block of wood, but you risk damaging
the sleeve. If you must go that route- be very careful to keep the
wood centered, square, and flat against the pusher tool. The outer
ring of the sleeve will NOT sit perfectly flush on the hub. Do not
concern yourself with this- as it doesn't affect the sleeve or seal
at all. The ring will bend out of the way easily when you install
the hub-bolts.
-
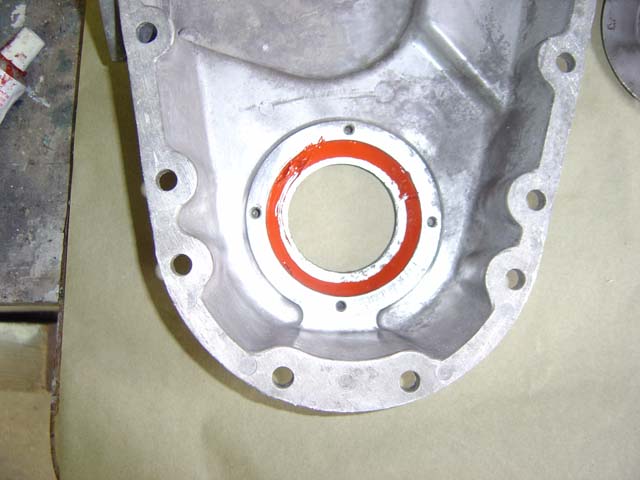
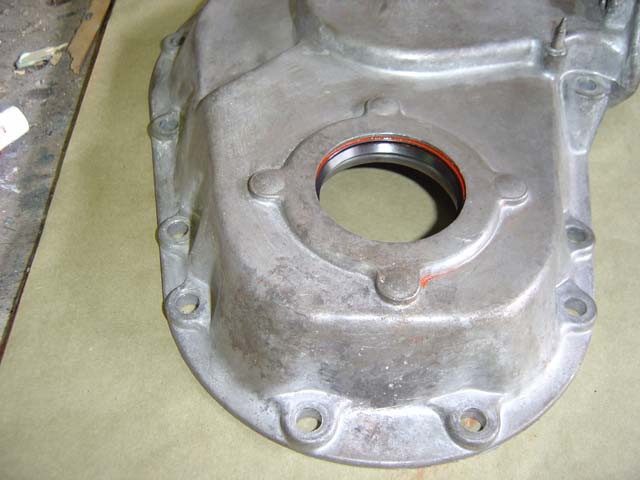
Installing the seal in the timing cover:
Put a small bead of Red Silicone gasket sealer- around the channel
that the new seal with sit in (see pic below). Center the seal, and
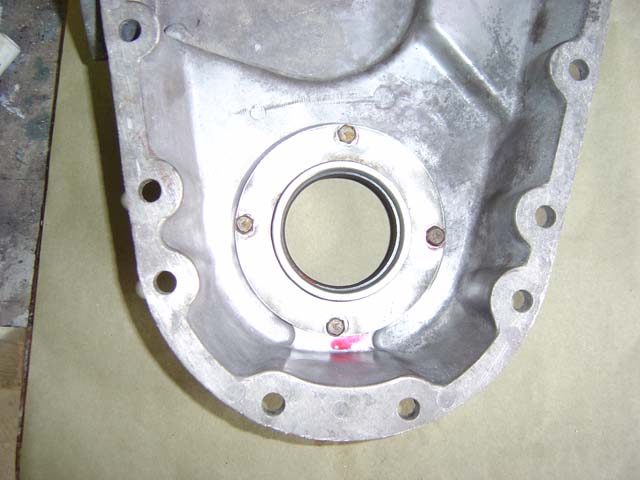
press it into the silicone. Place the (original felt seal)
retaining ring over the seal. Put a drop of RED Loc-Tite on the
threads of each retaining screw- and start ALL 4 of the retaining
screws. Tighten each screw 1/4 turn each- alternating sides,
until you are satisfied they will hold the seal in place. Be VERY
careful not to strip the threads in the timing cover- it is made
from soft aluminum, and it is easy to strip them. *** Depending on
your cover, retaining ring, and the screws, you MAY have to trim
1/16" off of the steel lip of the neoprene seal (that's what the
tin-snips are for). I have done 3 of these covers, and only had to
trim the seal on 1 of them. This trimming will allow the retaining
ring to seat against the cover better. If it looks like your
retaining ring isn't seating against the cover- remove it and trim
the edge of the seal. Glue a new timing cover gasket to the timing
cover using contact cement. Align it properly- using a few of the
mounting bolts- until the cement is dry.
-
Installing the Timing Cover: When you
install the timing cover- you MUST NOT bolt it up BEFORE you
install the hub. If it is not perfectly centered- the hub can
damage the seal as it is installed. Using the correct hub-pusher
set- greatly simplifies the installation. DO NOT hammer the hub on,
OR use the crankshaft bolt- to "pull" the hub on. This will only
damage the hub, thrust bearing surfaces, or the threads inside the
crankshaft. Remember to install the bolts in the hub BEFORE you
install it on the crankshaft. Be sure to lightly lubricate the
Redi-sleeve and neoprene seal before sliding the new seal over the
sleeved hub.
***Many people advocate heating the hub in an oven
to 250 degrees before trying to install it. I have done this- and
it does help. Be careful not to get it too hot- as you may damage
your new seal.
***I have a pusher set for installing the
crankshaft hub- so I'm rather spoiled. I slide the hub through the
timing cover- then place the hub on the end of the crankshaft- with
the cover hanging from a piece of wire. Install the pusher set- and
begin pressing the hub on. When the hub is close to being seated, I
install a few of the timing-cover retaining bolts. When the hub is
seated against the oil-slinger, you can install the rest of the
timing cover retaining bolts- then tighten each of them
-
Addendum: While you have the timing cover
off- It would be prudent to check the condition of the "filler
block" threads, and the front oil-pan gasket (cork). If the filler
block threads are the least bit damaged, or weak, NOW would be the
time to install some helicoils. I trim the front oil-pan gasket,
and put a bead of red-silicone sealer over the entire surface. This
seems to reduce any oil seepage from that area.
|