|
Dana Models 27 and 44 Rear Axle
Assembling a Dana Model 27 or 44 Tapered
Axle- and setting the endplay. This technical page was
written in response to a fellow NG member from the Alt.Autos.Studebaker
Newsgroup. If you have never visited the Newsgroup, it is a great
resource for information about the care and feeding of your pet
Studebaker.
Dave:
Here's how you set the endplay for your Dana 44:
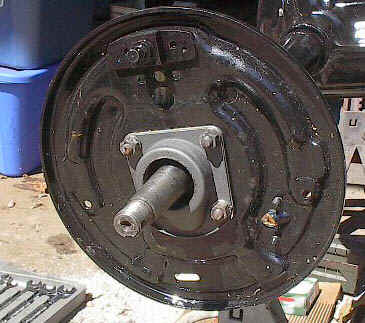
1) Put the left side together completely to the backing plate like
this: (sorry this is a right side picture- but it's the same on the
left)
Assembly Sequence: Bearing race, very thin paper gasket,
backing plate, reinforcement plate, reinforcement plate gasket, and
finally the grease cup with felt seal.
2) then install the right side's axle and bearing race.
3) Tap (firm- but not hard) the end of the axle and race with a
(plastic/brass) hammer and block of wood. (this "moves" and seats the
left side bearing race against it's backing plate and reinforcement)
4) The right side's bearing race will "obviously" not be fully seated
(you knew that). It will NOT be flush with end of the axle tube on the
right side. You will need a stack of shims to place over the end
of the axle tube (and race) until it "FEELS" flush with the bearing
race. These shims come in many thicknesses and it's not unusual for
there to be 5-7 of them needed.
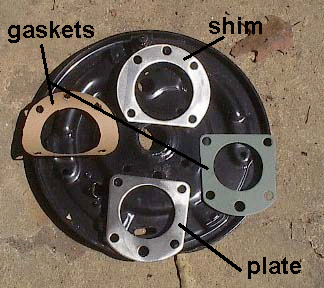
This is what each side should have-
except the left side has NO shims. The assembly sequence is: Steel
Shims, VERY THIN paper gasket (not a composite or thick gasket at all),
backing plate, reinforcement plate, reinforcement gasket, and then the
"grease cup (see pic 1)" with the felt seal.
5) Once you have the shims in place- put ONLY
the reinforcement plate on over them- and snug the bolts up (don't
overtighten). Tap on the end of BOTH axles (using the hammer and block
of wood) to "seat" the bearing races against the reinforcement plates.
This will be where you can measure the greatest endplay. Grab the end
of the right axle and try to move it in and out- If you can "feel" the
endplay- you have too much and need to REMOVE some shims. It may take a
few tries repeating the above steps to get minimal endplay. Once you
can't "feel" any endplay- it's time to put the dial indicator on. The
spec is .001"-.006" (one to six Thousanths).
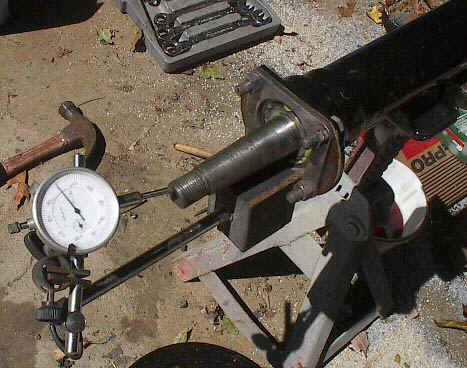
6) FIRST- tap EACH
axle again to seat the races. Do the right side FIRST- then the left.
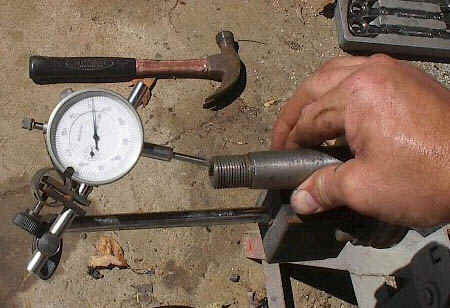
Install your dial indicator similar as shown above. Set the indicator
at .000 (zero). Grab the axle and try to "move" it in and out of the
housing- and watch the needle. If you can move the axle less than
.006".. then you are within spec. If it stays at .000 you will need to
add the thinnest shim you have- and repeat the steps above.
Here you see .002" total endplay
7) Once you have the endplay where you want it- remove
the reinforcement plate and install the thin paper gasket, backing
plate, reinforcement plate, reinforcement plate gasket, and the grease
cup with felt seal. Re-tighten all bolts holding the backing plates to
the axle tubes.
8) If it makes you feel better- you can reinstall the
dial indicator- and recheck the endplay
|